The L-30 is a 2x35W integrated amp made by Lux corporation in Japan. The company is still around, making hifi products.
When Uncle Pete brought over his amp, it was dirty from sitting around, unused, for many years. One of the knobs had come apart. Turning the knobs while the unit was powered on produced some awful scratching noises, and the knobs were stiff and difficult to manipulate.

I took the amp apart for the first time and cleaned the potentiometers with DeoxIT, a miracle contact cleaner. After turning each knob back and forth about a hundred times, the crackling was eliminated. I also blew out a cubic foot of dust and made some observations about the electronic guts.

Many of the original electrolytic capacitors had leaked their electrolyte gunk (see the big black one in the image below).

I found a great resource on repairing this exact amplifier. The author advised to check the small signal transistors for a "silver oxide creeping disease". The problem was that in the 70s, Hitachi "tinned" the leads of many transistors with silver (instead of tin). Silver oxidises over time, and the rust creeps up the legs of the transistors and eventually rots the guts.
 |
| It's hard to tell that the leads of the smaller transistor (installed back-to-back with a larger one) has blackened legs, not silvery/metallic like the other components. |
I found some great supporting resources:
- Luxman L-30 Service Manual - circuit schematic, parts list, circuit board layout diagrams, and re-calibration info. Absolutely critical!
- Hans Hilberink's Luxman Vintage Audio Website, specifically this page about the L-30.
- Vintage Audio Repair L-30 - Dutch website with great before-and-after pictures of an L-30 rebuild.
So, what's the final scope? I decided to:
- Replace 42 electrolytic capacitors, same specs as originals. I am not savvy enough with analog circuits to contemplate upgrades;
- Replace 17 small transistors (TO-92 package);
- Replace the factory speaker terminals with newer, nicer binding posts with banana plug connectors;
- Do a nice cosmetic cleanup of the knobs and faceplate.
What I did, and what I learned.
I spec'd and ordered all my parts from Digikey. My parts list is here on Google Sheets. I ordered Nichicon brand capacitors (UKA, USW and UKT series) and ON Semiconductor transistors. For the capacitors, if I couldn't find an exact replacement, I spec'd the same capacitance at the next-highest voltage rating.
I splurged and bought wire labels for disassembly. This was probably the best idea I had for the entire project. The kit of professional wire labels kept me organized and made re-assembly a cinch. (the link to the kit is in my parts spreadsheet, linked above).
Mistake #1: Instead of desoldering the wired pins from the circuit board, I desoldered the wires from the pins, instead of the pins from the board. This made reassembly WAY harder than it needed to be! In fact, to reassemble, I desoldered the pins from the board, soldered the pins to the wires, then soldered the pins back into the board. I doubled my work for no reason.
 |
| Top: Desoldered pins from wires. Mistake! Bottom: Pins soldered to wires, with nice labels. |
First up for replacement were the capacitors. They were simple to replace because the polarity is printed on the circuit boards.
Another great purchase for this project was a solder-sucker. Previously I'd only used desoldering braid (copper braid that absorbs solder when heated). A solder-sucker makes it SO EASY to remove components - suck off most of the solder with a puff of air, then remove the tiny remaining bit with braid. The sucker I got is on my parts list too.
 |
| Top: New capacitors in blue (bigger ones) and gold (smaller ones). Bottom: Original PB-1009 circuit board. |
- They have three leads (leads);
- The pin-out of the new transistors (Emitter-Base-Collector) is different from the old (Emitter-Collector-Base), and;
- They must be installed correctly or else they won't function as intended! Funny things will happen.
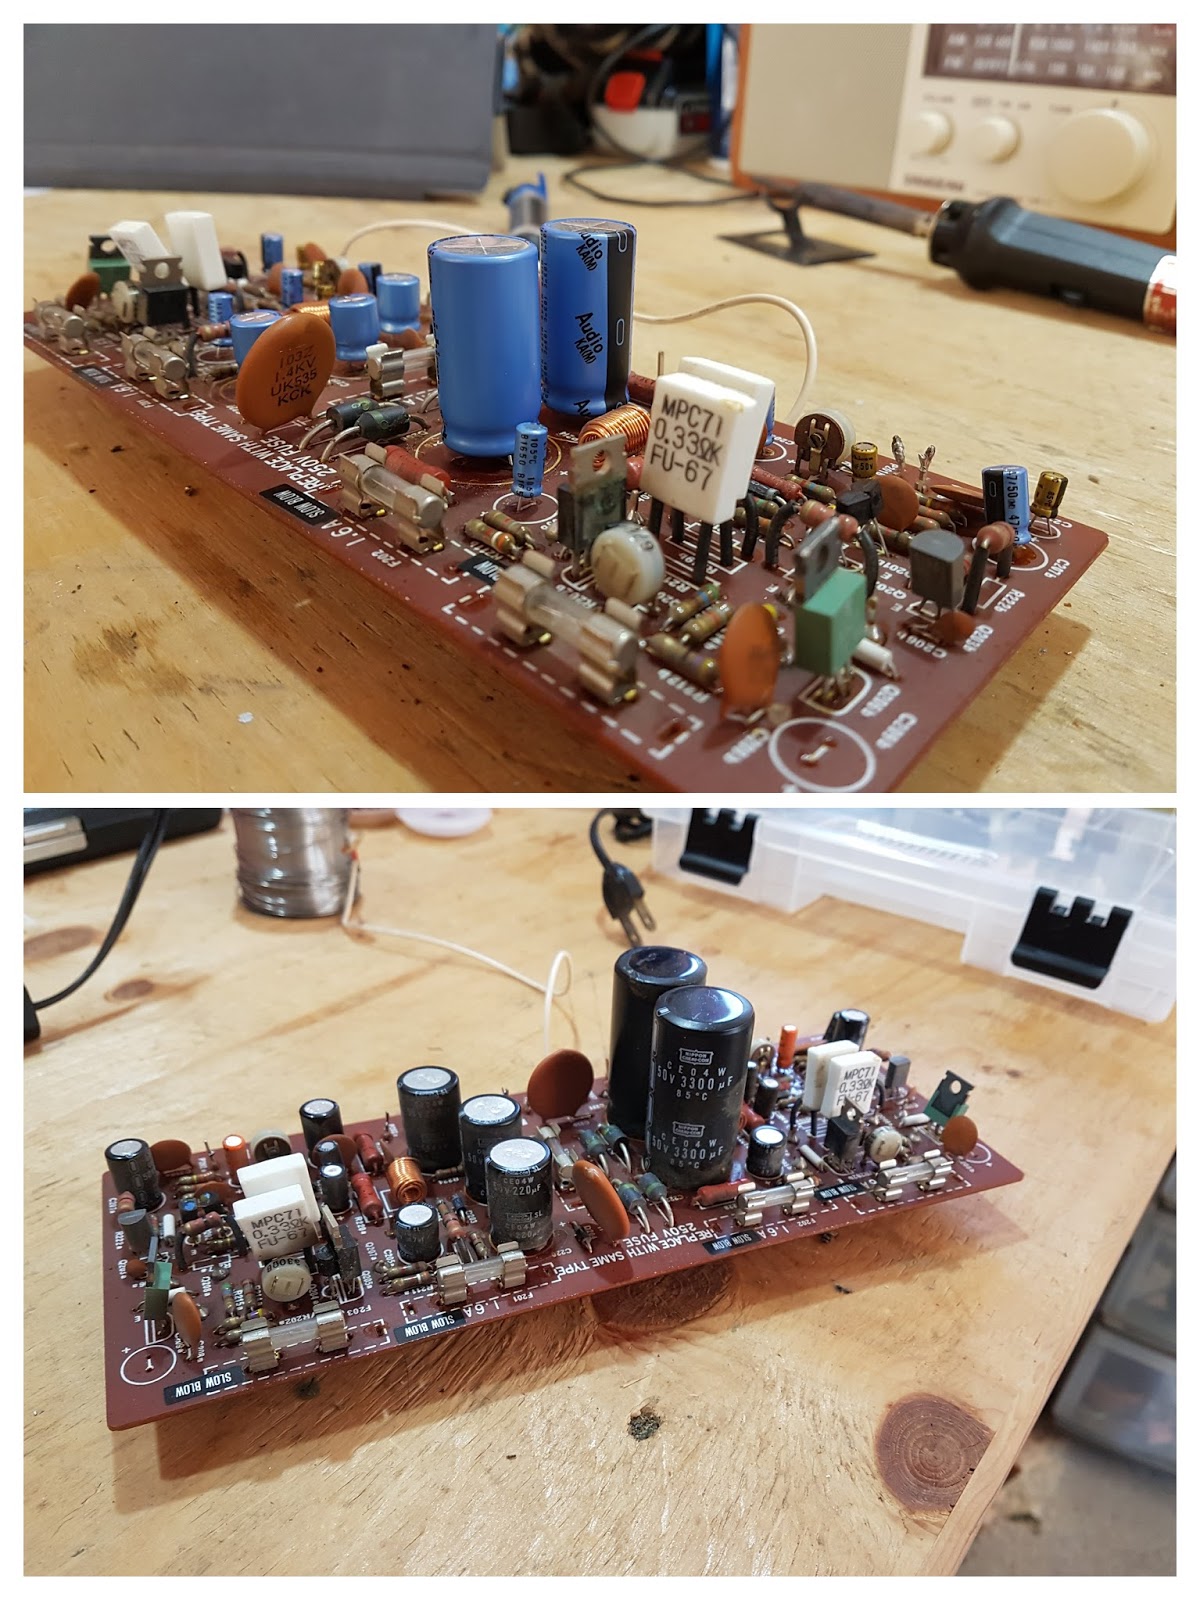
 |
| Top: PB-1008 with new capacitors (blue, gold) and transistors (black). Bottom: Original circuit board. |
The last upgrade was replacing the old wind-only speaker binding posts with modern banana jacks, where you can wind or insert your bare speaker wire, or plug in a cable with a banana plug.
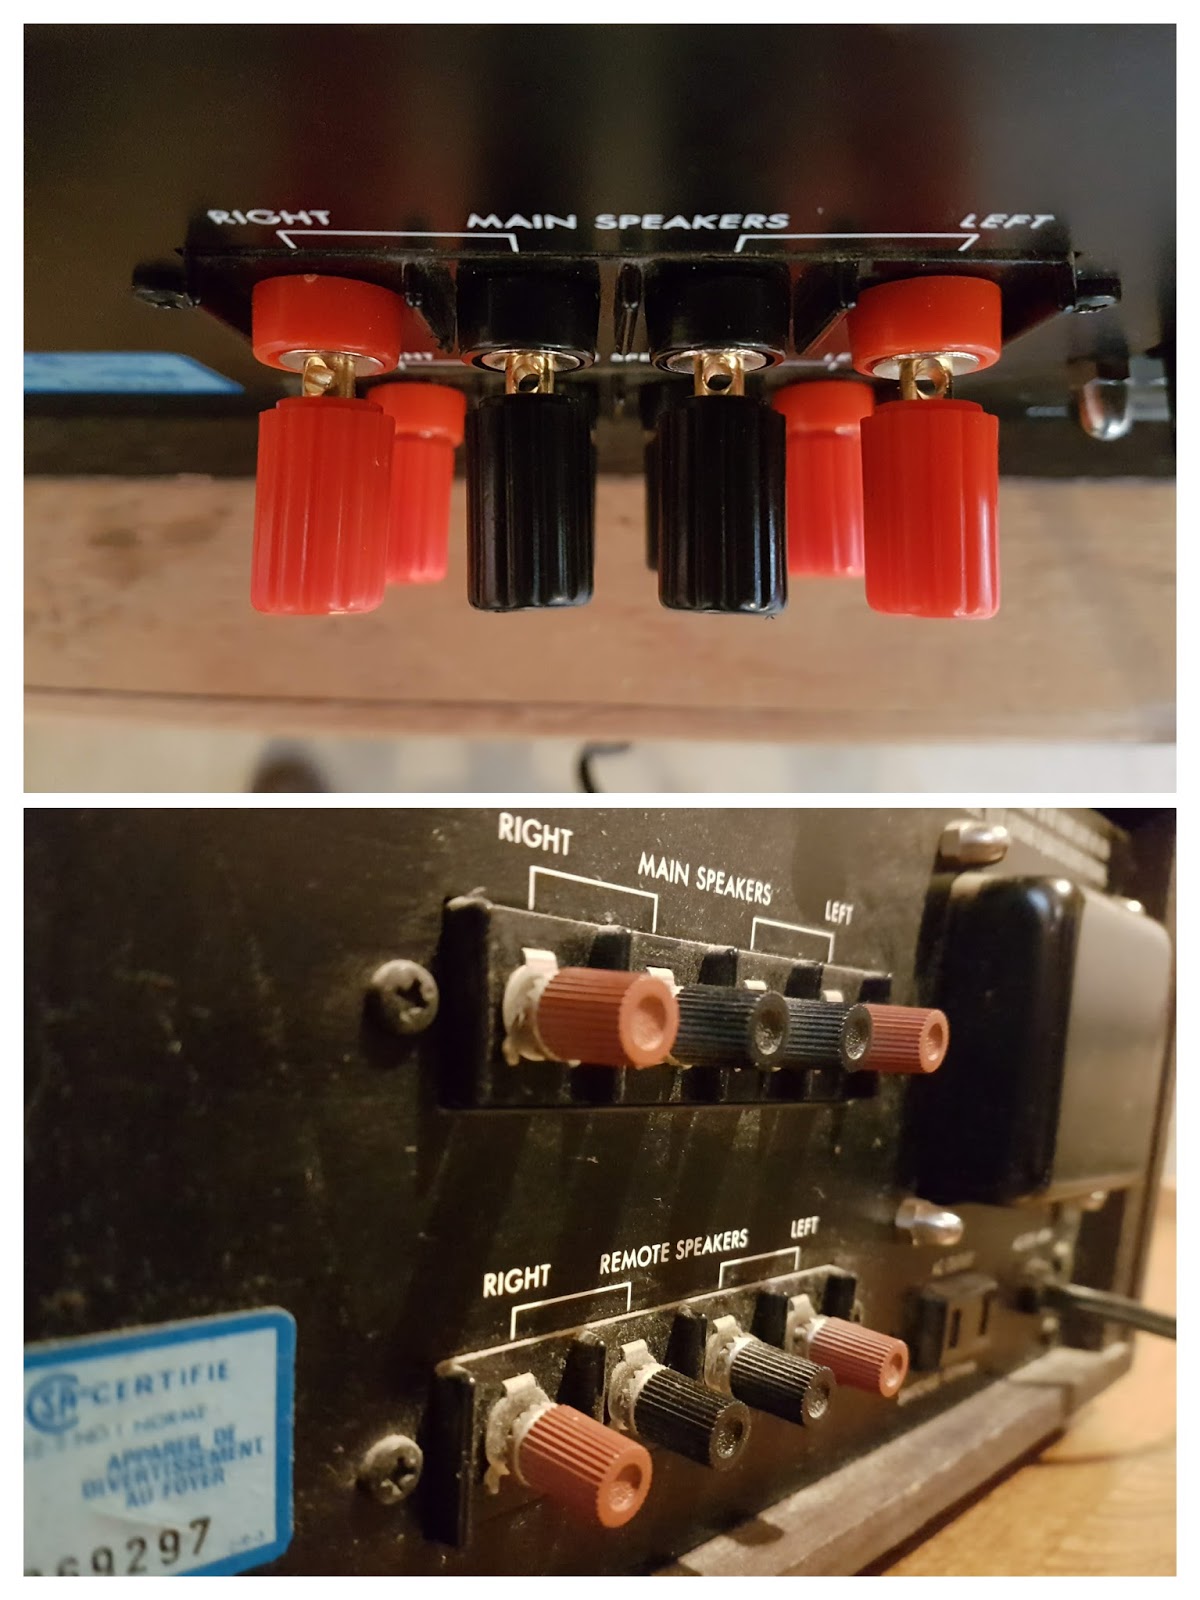 |
| Top: New binding posts. Bottom: Original speaker terminals. |
Next up: testing and reassembly.
I carefully reconnected the pins and wires to the two main circuit boards and arranged them back in the case. I followed the instructions in the service manual to do the 2-step calibration. Step One was an "Idle [current] adjust"; you remove a pair of fuses and measure the current between two terminals. If, after a minute of power-on time you're reading 45mA, you're good to go. I was fine. A good start!
Mistake #2: The second step is to check the "Zero DC [voltage] offset". You want the reading across each channel's speaker terminals within +/- 50mV (millivolts). I measured the right channel at about 25mV. I measured the left channel at 33V - over 600 times what I expected!
Disappointed, I pulled everything apart and started hunting for mistakes. I knew it was going to be a transistor installed incorrectly because one channel was good, one bad, and capacitors don't amplify voltages. After a few minutes of searching, and double- and triple-checking my work, I found one transistor (Q202a) installed incorrectly.
Lesson learned: the calibration procedure was critical. If I had just plugged it into my speakers to test, I'd be shopping for a new pair of speakers.
 |
| Work bench during one disassembly. |
Excited, I put everything back together for final testing. Both calibration checks checked out. All good. It's time to fire this baby up!
I assembled the amp and took it inside. I powered it on. I queued up a record, dropped the needle, and....
Nothing.
Not a sound came out of the speakers. I turned up the sound just a bit. I heard something - so I maxed it. Terrible, choppy, intermittent sound. I could hear all the loud bits but the quiet parts of the song just dropped off. Stuttery.
My heart fell - I really thought it was going to work. I had no idea what the problem might be. Disappointed, I went back to the garage for disassembly #3.
Mistake #3: Since the problem was present on both channels, I reasoned that I had a serious issue with parts/components. I printed out 7 transistor data sheets (4 old types, 3 new) and started comparing specs.
After a few minutes of comparing data sheets I realized that I did something so dumb that I had to quadruple-check to be sure. Everywhere I wanted to install a BC550 transistor, I'd installed a BC560, and vice-versa.
How did I manage something like this? I looked at my parts list, and from Day 1 I'd spec'd the wrong transistors.
I figured it out later that day. Looking at Hilberink's website again, he says:
The 2SA836 and 2SC1345 made by Hitachi will sooner or later add a lot of noise and even storm and thunder to your RIAA amp. [...]I read these two sentences, and without even thinking to double check, noted to replace 2SA836 units with BC550, and to replace 2SC1345 units with BC560. In fact, it should have been the other way around (2SA836->BC560, both PNP type, and 2SC1345->BC550, both NPN type). This was totally my error - rushing, misunderstanding, and not double checking. I only had to replace 11 transistors and I'd be all set.
Replace with modern BC550C/BC560C and all noise problems are history.

One more set of calibrations as a sanity-check, then I assembled the L-30 for the last time. I'd cleaned and polished the faceplate and all the knobs. The volume knob, which had fallen apart, was securely glued back together.
I plugged the unit it and dropped in an Ella Fitzgerald & Louis Armstrong album that I found in my parents' collection. I don't have the musical vocabulary to describe it as anything other than AMAZING. Superb warm sound.
 |
| That warm sound... get it? |
My Uncle Pete came over tonight to pick it up, and I think he was blown away. He brought over a record (I don't recall which one!) and we listened to most of the A side. Then we listened to tracks from The Sword, The Rolling Stones, Yngwie Malmsteen, Tony Bird, Eternal Champion, Iron Maiden, and Buffalo Springfield.
What's next?
Full album/gallery.


